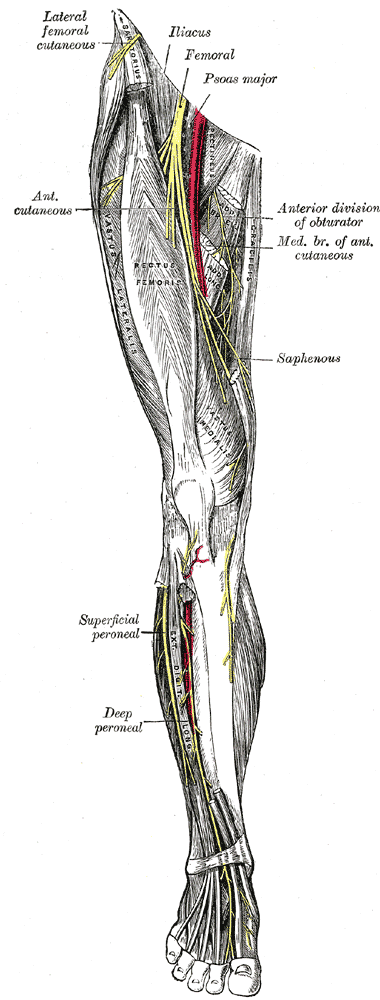
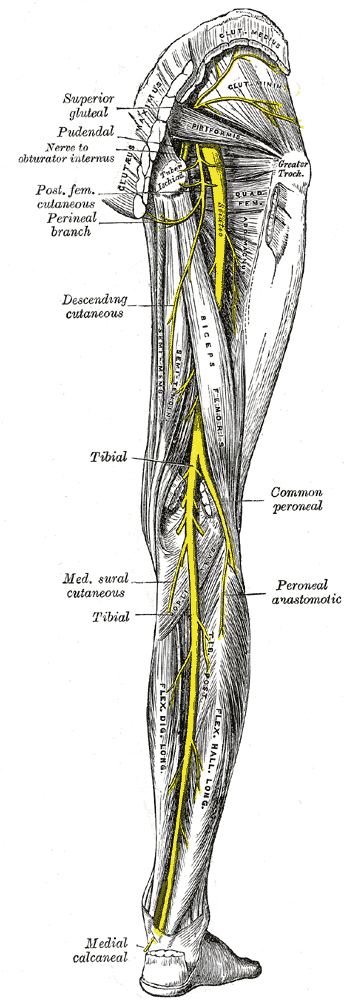
The following is an in depth look at the anatomical structure of the nerves and muscles in the leg and the most efficient ways to render them inoperable. In addition we have included several set ups, combinations and techniques for using the information provided by the anatomical study.
As a side note, we learned from Dr. Cacciamani that there are two ways to cripple and immobilize the leg. 1 is an attack to the primary nerve structures (e.g. the Sciatic Nerve) and 2 is an attack on the muscle tissue. From our research, the difference is generally that nerve attacks immediately cause the temporary loss of control for the limb. Whereas muscle tissue attacks cause swelling, cramping/knotting, and gradual deterioration of muscle function.
This makes sense if you think about it. You can take out the structures that send messages to and from a muscle/group of muscles or you can pulverize the muscle itself. Bottom line is, if your opponent can’t or doesn’t want to move his/her leg anymore, you’ve pretty much done the job.
Included are some diagrams for reference. And below that are a series of videos showing how we like to apply the information we’ve learned from Dr. Cacciamani and from our independent research.

Anterior Neuromuscular Anatomy of Human Leg
| 
Posterior Neuromuscular Anatomy of Human Leg
|
You can watch them in any order you wish, but
I have tried to assemble them in a loosely organized fashion in hopes that our readers will see how the various techniques can be used to compliment each other
and to form a catch all for reactions, energies, and defenses to any one particular attack.

Top View of Fascia and Nerves in Human Leg
Due to time constraints, I have initially included only 5 additional clips in this article. I will be updating it often over the following weeks until all the following clips are published:
- Jab + Cross + Right Kick (unloaded leg theory)
- Right Kick Counter to the Jab + Cross (loaded leg theory)
- Jab + Cross + Hook + Right Kick (loaded leg theory)
- Overhand Right + Left Kick (loaded leg theory)
- Left Kick Retaliation to Right Kick (loaded leg theory)
- Draw Step Set Up for the Right Kick (loaded leg theory)
- Swing Kick Counter to the Right Kick (neutral leg theory)
- Outside Angle Kick Counter to the Jab + Cross (neutral leg theory)
- Jab Set Up for the Outside Angle Kick (neutral leg theory)
- Left Inside Leg Kick Set Up for the Right Kick or Outside Angle Kick (neutral leg Theory)
- Calve Punt(neutral leg theory)
- Over-Riding The System, Forearm Chop, Knee, Heel Kick from the Clinch
- Forearm Smash Attack vs Guard Pass Prevention
- Elbow Spike Guard Opener
No comments:
Post a Comment